Showing posts with label Make-up. Show all posts

Wednesday, July 6, 2016

How To Make Your Make-up Last During The Summer Heat

Nobody wants to be half way through there day and trying to reapply their make-up at the beach. You also don't want the sweat lines from your foundation running down your face. Here are some great ways to keep your make-up looking great through the hot summer days.


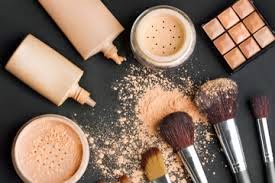
1. Use A Primer. Primer's will make your make-up go on smoother, moisturize your skin and last much longer then your make-up would without it. They also have an SPF in them as well. But be sure to reapply sunscreen if you are going to be in the sun all day.


2. Avoid Heavy Foundations. Most liquid and cream foundations contain oil in them which will sweat off in the sun giving you a streaky look. Try using a powder instead. If you would rather have something with more coverage, use a cc cream. They moisturize your skin, contain an SPF and provide great coverage. The coverage is so good because it soaks into the skin, so it doesn't sit on top of it and it works for all skin types.


3. Use A Brush And Nix The Sponge. Sponges apply make-up much heavier then a brush will. When using a powder you want a light hand to apply an even coat. Using a brush will give you a lighter, more natural finish.


4. Make Your Eye Liner Last. For the summer, liquid liner is too much, and crayon liners will melt off. To have great eyeliner, apply with a pencil liner 1st then top with an eye shadow of the same color. It will make the liner pop and stay on longer. Make sure to use an eye shadow primer 1st.


5. Stick With 1 Shadow Color. If you are going to an event or something special, then play up the eyes with one of your normal looks. But for an every day summer look, keep it simple. Stick to one color on your lids. 

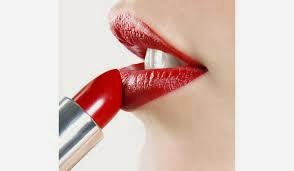
6. Avoid Dark Lips. Dark lipstick is gorgeous, but harder to touch-up. While you can help seal it in with a powder or by lining your lips 1st with a lip liner, it's just best to switch to a lighter color. They are easier to fix and you can wear them all day a lot easier.


7. No Lip Gloss. Did you know that lip gloss attracts sunlight, which can lead to sun burnt lips? Well, it can! Ouch! If you are looking still to have a hint of color, try a tinted lip balm instead. You can apply one that has SPF so you won't have burnt lips.


Summer days are some of the best days. All the fun and memories you make, shouldn't be with half smeared make-up on your face. For all of those who love to go bare faced, more power to you. For those of us that prefer a little something, hope these tips help!


~aphrodite


Tips From: Reader's Digest
Article: Summer Make-up Tricks: 9 Ways To Make Your Make-up Last In The Heat

Friday, December 11, 2015

Brushes & Make-up

Applying make-up is much harder than it looks. There are so many different types of make-up brushes and not everyone knows what they are for. We will tell you what they are for and show you what they look like. Also we will pair them with the in make-up trends for this winter and into the New Year. 

1. Lip Brush. A lip brush is used to apply lipstick for a smoother look. It works great to blend the color into the liner and if you are doing an ombre lip to blend the colors together.

The in lip colors are cherry red, plum, coral-pink, sheer browns or  nude.


2.  Liner Brush. A Liner brush is used for filling in eyebrows and for easy eyeshadow application on the upper and lower lash line. 

The trend: filled in eyebrows
3. Fan Brush. A fan brush can be used to easily apply a highlighter on your nose and cheeks. It also can be used to remove excess eyeshadow from under your eyes.


3. Multi-purpose Brush. Every girl needs one of these in there make-up kit. It can be used to apply blush, foundation, or bronzer. It allows then to be applied evenly and smoothly.


4. Contour Brush. Used to define at the jawline and cheek bones with foundation, or a bronzer. It makes the jawline look thinner and makes cheek bones more defined.

 5. Stippling Brush. This is used to dot on or blend in liquid foundation so it gives it a smooth, airbrushed appearance.

6. Tapered Brush. This is used to blend blush across the cheeks so there are no harsh lines or color separations. You can spot a tapered brush because the tip is rounded off instead of flat. They come in a variety of sizes.


7. Eyeshadow Brush. A basic eyeshadow brush is used to apply all over eye color in a smooth motion.


8. Angled Eyeshadow Brush. This brush is used to blend shadows into the crease of the eye socket, it can also be used for applying shadow along the lash line. They are made of foam unlike other brushes.


9. Smudgier Brush. Used to smudge eyeliner or eyeshadow for a less perfect look.


10. Blending Brush. Used to blend to eyeshadow colors together or to apply a highlighting eye color at the brow bone.


The trends: bold shadow, and naturals. What ever color you go with make sure it stands out.


I hope you enjoyed these trends and learned what your brushes are. 

~aphrodite


Wednesday, August 26, 2015

Fall 2015 Make-up Trends

Now that summer is starting to come to an end, and school is going to be starting up soon, it is a good time to look at the trends that are going to be happening. Be prepared for colder weather, shorter days and lots of awesome make-up.

1. Red Lips.
Red lips are a constant staple of fall and winter. Try to change it up and go for more of a brick red instead of an orange/red or berry color. If you have been wearing a lot of nude lipstick lately, this will be a great way to make your lips noticed.


2. Liner.
Eye liner is a great way to enhance your eyes or make a dark, mysterious look. Use plain, black eyeliner and do your thing. Whether you like it simple, a little smudged or even a cat-eye, there are dozens of ways your can line your eyes.


3.  Blush.
When changing up your make-up habits for the fall, remove the taupe colored powders and bronzers, and go for a lighter color like a rose or peach. It will give a hint of color, without making your face too pink. The more natural looking the better.


4. Metallic.
Want to add a little something to your smokey eye or everyday look? Try a gold, silver or bronze liner. Try out each to see what you like best, and add a line to your eyes when doing your make-up instead of the normal black or brown. You can go for an all metallic look by doing metallic eye shadow. Or you can use the liner by itself without any shadow.


5. Goth Lips.
Who would of thought that the 1990's would come back into style for make-up. Well it has. Choose a dark red or dark purple lipstick that is almost black, and apply. Rock it with air-dried hair or a messy bun. Just to add something different and fun into a look. Keep the rest of your make-up natural looking, so your lips are the center of attention.


6. Lashes.
Long, gorgeous lashes make all girls envious, but now you can have your own. There are so many types of fake lashes out there and lengthening mascara, there is no excuse as to why you can't have amazing lashes. Try some false lashes, and add a coat of mascara over top to really amp them up. You can even try different styles, and colors.


Try some of these amazing and maybe a little out there looks this fall. You never know when you can find your new favorite make-up look.

~aphrodite

Wednesday, May 6, 2015

Look Goregous In Minimal Time

Are you one of those girls that are always over sleeping and never having enough time to get ready in the morning? This is going to be the perfect blog post for you. Here are some ways to look completely put together in much less time.

1. Five Minute Morning Routine
The five things you need to make your face ready for the day are concealer, foundation, lip gloss or stain, brow filler and mascara. Use the concealer to hid dark, under eye circles and breakouts. Apply foundation to your entire face for an even skin tone. Lip gloss for some added color to your look. Brow filler so your brows look perfect even if they haven't been waxed in a while. And lastly add mascara so your eyes look bright and awake.


2. The Quick Wash
Have bangs that look dirty but no time to wash your hair? Pull your hair in a ponytail and just wash your bangs real quick in the sink. Dry and style as usual. For the rest of the hair, you can rock it in a ponytail or add some dry shampoo to the roots and brush it through.

3. Style The Night Before
Looking for beachy waves? The night before add a texturizing cream into your hair then braid into to braids.  In the morning undo the braids for a messy wave.

4. Use 2 in 1 Products
To line your lashes and fill your brows use a brow liner to double as both. You can also use a light pink lipstick as a blush.


5. Moisturize While You Sleep
Why not do two things at once? Put a hydrating mask on before you go to bed, and sleep in it over night. In the morning rinse and wash your face as usual in the morning. Your skin absorbs things better while you sleep, so your face will feel extra hydrated in the morning.

6. Multi-Task
Find ways to do two things at once. It doesn't matter what your doing, just find away to do more then one thing at a time.

7. Red Lips
Nothing says put together more then red lips. Just apply a quick swipe of your favorite lipstick and you are good to go.


8. Relieve Dry Feet
This is one thing I always tell my clients to do. If you have dry, cracking feet, apply Vaseline on them and sleep in socks. Continue this every night during the colder months to keep your feet soft and smooth.


9. Organization
If you have a hard time finding beauty products when you need them, try organizing them. Create little baskets or drawers to store each product you need. Use a shelf in the bathroom for all your hair products, and a drawer for all your clips, bobby pins and hair ties.


10. Night Time Showers
Try to shower the night before. If you aren't planning on washing your hair, then save time and shower the night before. It will shave a good 5-10 minutess off your morning routine.

11. Change-up Your Ponytail
Put your hair in a high pony-tail and instead of letting everyone see your hair tie, apply hair wax on to a small section of hair and wrap it around the ponytail. Secure it with a few bobby pins.


12. Use a BB Cream
A BB cream is great for adding some color to your skin like a foundation, and adding sunscreen in one step. Apply it like you would a foundation to your entire face and make sure there are no streaks. It helps moisturize your face and fill in any fine lines.

13. Dry Shampoo
Invest the money in a new best friend, dry shampoo. It is perfect for those late days when you don't have time to wash your hair. Spray 10-12 inches from head and then brush through the rest of your hair. 

14. Air Dry
If you really need to wash your hair and don't have time to style it, apply some leave-in hair products at let it air dry. To create lose waves, add a texturizer into your hair and wrap into a bun. Let dry for a few hours and let it down for gorgeous waves.


15.  Neutrals
If you are low on time to do your make-up stick with more neutral tones. Apply foundation, a light pink blush, mascara, a light lip gloss for shine and brown or gold shadows. It will all blend together so nobody will know if its not perfect.


Try these great tips to help reduce the time of your morning routine, or make the most of it if you are not one who gives yourself much time to get ready.


~aphrodite

Wednesday, April 29, 2015

Brilliant Beauty Hacks

Everyone women wants to look great and feel great but doesn't necessarily want to take the time to do so. Here are some of the in trend looks currently and how to make them easier for every day looks.

1. The Nude Lip
Finding the perfect nude lipstick is nearly impossible. You can achieve this look one of two ways. For a shine first apply a foundation to your lips patting it so it fully covers the lips and then apply a lip balm on top for a slightly glossy look. For a more matte look, use a nude color lip liner to outline and fill in your lips. Then apply a bit of concealer on top for the perfect matte finish.


2. Lasting Lipstick
To make your lipstick last, first fill in your lips with a nude color lip or eye liner. Apply a layer of loose powder to fill in any ridges or cracks on your lips. Next apply your desired lip color and finish with the matching lip liner to define your lips, as well as apply over the lipstick. 


3. Highlighters
Every have the problem when you are trying to apply a highlighter and it becomes too shiny? Mix it with an eye cream. This will tone down the shine and allow it to be applied with ease and more skin like.


4. Lipstick Smudging
Does your matte lipstick smudge? Try to use a matte lip balm or a lip primer on your lips before applying your favorite lipstick. This will allow it to adhere better to your lips. 


5. Create Your Own Color
Thinking your nail color is just not quite right? To make the color darker, apply a darker shade as the 1st coat and then layer the desired color on top. So if its a red you want to darken, add a darker red or a brown underneath. If you want to lighten it, add a white or pale pink underneath. 


6. Use White
To make your face appear thinner, when you contour use white. Apply it to the high points on your face, such as eyes, cheekbones and chin, so it gives a slimming effect to your face.


7. Glitter Polish Removal
Have the hardest time removing glitter nail polish? Use pure acetone and a cotton pad. Cotton balls will just shred against the glitter. Apply acetone to the pad, and set on your nail for 10 seconds. Then begin the removal. You will notice how much easier it comes off. Apply cuticle oil after to your nails.


8. Bad Nails
To give the appearance of nice nails, use a white ridge filling base coat. It will help hid the imperfections of the nails and allow the polish to glide on smoothly if it usually doesn't.


Try out some of these great make-up and nail hacks next time you go out. I am sure they will make you have great, long-lasting results!

~aphrodite

Wednesday, November 5, 2014

Picking The Right Shade For Your Skin

Choosing the right foundation and concealer may seem like a simple task right? You just go the store pick one that looks about the same color as your skin and buy it. Just that easy, right? Not quite. There are a few different things you should look for in choosing the right shade for our skin. Here are some tips to help you pick the right shade for your skin.


1. Know What You Want.

There are many different shades, brands, and types of foundations. Before you start choosing, find a brand that works for your skin. Some can be oil based, and can cause skin to breakout. Also decide if you like powder, cream/mousse or liquid foundation. Powder tends to be better for a bronzer or a blush. Liquid and cream/mousse blend into your skin to leave a flawless look. Do you like a matte or shiny finish? Matte finish is usually better for younger ages because they have more oil production in there skin, as you age your skin does not produce the natural oils that it used to which tends to dull your skin out. 


2. Compare Each Product. 
Find three shades that are close to your skin tone, and compare them side by side. You can compare different brands with there similar shades and find out which one brand goes on the smoothest. Then switch to 3 shades that fits you like against your skin and apply them next to each other. At this point you will notice the flaws of the other colors. Do this a few times to be sure that the color you picked is perfect for you.


3. Test on the jaw.
Testing colors along your jawline, allows you to find a color that blends into your face and neck. Because your neck maybe lighter or darker than your face, it is important that foundation blends nicely so there are no harsh lines and it doesn't look like your face and neck are different colors. If the color of your neck and face have a noticeable difference in shade, select one that matches your face, and blend it down into your neck. Make sure you blend it really well.


Good
BAD

3. Test in natural light.

Natural lighting is when you will best see how the foundations you have chosen look on you. The lighting in stores can distort the way it looks. So if you are in a store and cannot find natural lighting, buy 2 or 3 and take them home to test them out and return the ones that do not work. Most places will take the returns as long as you have a receipt.

4. Oxidation.
Some products will change colors when the skins oils mix with them. Apply a color on the inside of your arm and watch the color for an hour or so. If it begins to changes colors, then it is not the right shade for you. Instead go a shade lighter so if it darkens slightly it still blends in.


I hope these tips help you find the perfect shade of foundation for your skin. Be sure to test out a few different options, because there can always be something that looks even better than what you currently love. 

~aphrodite